Thursday, December 8, 2011

Cake Pop Tutorial!

I know you have seen cake pops all over the place! Here's how to make them yourself!

You will need:
From the grocery store:
• 1 cake mix (I used a box mix)
• 1 can frosting (or a few cups if you are making your own)
• wax paper
From your local craft-store:
• Wilton cookie sticks
• styrofoam
• 3 bags of candy melts
FYI - Duncan Hines Red Velvet Cake mix will stain your hands red. - I learned this the hard way!

Step one:
Start off by baking your cake, according to the directions on the box, and let this cool completely. (I let my cake sit about 5 hours before I began making the pops)

Step two:
You can do this with your hands, but I prefer to use my mixer. It's quick and easy. Break large pieces of your cake off, and toss them into your mixer. Put your mixer on it's lowest setting. (I added a few pieces, turned on the mixer, and added a few more) I prefer a chunky consistency, with bigger clumps of cake, for fluffier cake pops.
This was just a regular yellow cake, made from a boxed cake mix.

Step three:
Once your cake is broken up to your liking, add some frosting. I have found that most recipes use WAY too much frosting. Start with 1/4 of the can of frosting, and mix it together. (again, I did this in my mixer, but you could do this with your hands, or a spatula. Whatever is easiest for you)
The amount of frosting you need varies on how moist your cake is. You want this cake "dough" to be able to hold together and ball, without being too sticky.
This is the consistency I like, where the cake is just barely holding together. Anything stickier can be a pain to ball up.

Step four:
Using a tablespoon, scoop a heaping spoonful of the cake "dough" and ball it with your hands. (I use a circular motion with the dough in my palms to make nearly perfect circles) You can get about 35-45 balls from one cake.
You don't want them too large, or they will be too big to eat.
Lay the balls on a wax paper covered cookie sheet (or parchment paper works) and REFRIGERATE. Don't skip this step!! You will have problems later on if you do! Refrigerate at least 10 minutes.

Step five:
While your balls of cake are chilling, it's time to melt some chocolate. You don't need all of it at this point, so put about one bag of your melts into a microwave safe bowl, and microwave on half power, until melted. (to avoid burning the chocolate, I stir EVERY 30 seconds) The old method of using a double-boiler works just as well.

Step six:
Grab your lollipop sticks, and dip about the bottom 1/2 inch into the chocolate, and stick into your cake balls. (this acts as a glue, which will help hold the cake ball to the stick) If your chocolate starts to harden before you finish, just put it in the microwave for a few seconds.
Put the cake balls, with the sticks in them back into the refrigerator again. (don't skip this step!! Sometimes I leave mine over night, to break up the work. I would recommend at least 30 minutes to harden the chocolate)

Step seven:
Melt the remaining chocolate. (you can remelt the any leftovers you have too) Dip the cake balls into the melted chocolate. I found a quick spin of the cake ball helped for even coverage. I tapped the stick on the edge of the bowl gently, to shake off any excess chocolate.
Add your decorations or sprinkles while the chocolate is still wet. Then set the cake pops in styrofoam. If you couldn't find styrofoam, a coffee mug works well too!
Step eight:
I let my cake pops sit on the counter until I finished all of them, and then put them into the fridge to help harden then chocolate and set the pops. You will want to chill these a minimum of 2 hours before serving. I usually leave mine in the fridge for 1-2 days before serving.
Enjoy!
Have left-over chocolate? How about marshmallow pops? (tutorial coming soon!!)

Wednesday, December 7, 2011

New Designs: Custom Holiday photo Cards!

Check out the newest product line to hit my etsy shop.... Custom photo cards!


Joy Holiday Card - Design available in my etsy shop.
Get the photocards customized with your photographs here. New designs will be added consistently, so be sure to follow us on this blog, facebook, or twitter, to keep up to date on the newest designs.

Gorgeous photos, right? Hire the photographer for yourself. Contact info here.


Wednesday, November 30, 2011

Eat, Drink, Be Merry Holiday Party

Eat, Drink, and Be Merry! It's what the holiday season is best for! Here's the newest printable partyware at TypeWink:

To go with the blue theme, I baked some cake pops. (tutorial coming soon) and made some marshmallow sticks. YUM! Add some blue candy canes, a blue cocktail (or blue colored drink) and you have yourself a party! 
So get celebrating! Find the complete party pack here.

Monday, November 28, 2011

SNEAK PEEK - Eat, Drink, Be Merry Party

I admit it, I love throwing holiday parties! Here's a sneak peek at the newest DIY holiday party coming to TypeWink Printables.
They say the color gray is the new black, and I am obsessed with it. It matches almost any color, and looks so modern.

Happy Holidays Party!

Thanksgiving is officially over, so I am in winter party overdrive! Check out our newest printable partyware:
 Don't you love my new cupcake stand? It actually is two pieces, too. The ribbon is removable, so you can change the look in a snap.
Red, white, and snowflakes, always a classic this time of year, done with a modern twist. This design was a huge hit with our guests. (red and white foods and matching party decor are especially easy to find this time of year) The newest addition to the party packs are the squares. They can be used as cupcake toppers, flag straws, labels for favor bags, and envelope seals. (to name a few!)

Tuesday, November 22, 2011

Happy Holidays Party - Sneak Peek!

It's not Thanksgiving yet, and I am already thinking Christmas this year. (I think the early snowfall really got me in the mood for the holidays!) Here's the newest printable party pack design. Coming soon! Be sure to follow us for more updates to the storefront. Happy Holidays! ;)

Let It Snow Party!

It snowed an unexpected 8 inches last week, and I was terribly unprepared! (there wasn't even hot chocolate in the house!) We love to celebrate the first snow of the winter season, so with that in mind, I created the newest addition to the printable party collections, Let It Snow:

Bring it mother nature! You can find it in my etsy shop

Sunday, November 20, 2011

Sneak Peek! Let It Snow Printable Party Theme

After nearly 8 inches of snow came down on us, I was in the mood for a winter themed party. Here's a preview of the newest printable party set coming to the store. I will post more pics once I have the party pack listed.

Tuesday, June 29, 2010

Cow and Sheep Cupcakes!

Here is some cupcake eye candy for you:
How cute are these cow and sheep cupcakes? I created them to match my On The Farm Party Pack, available in my etsy shop. Instructions on how to make these cute cupcakes are included with purchase of the party pack.

Down on the Farm Party!

Inspired by my nephew, who has a love for all things farm, I created a new party pack.
The pack is available in my etsy shop. More details coming soon!

Tuesday, January 26, 2010

Real Party Pics!

I just received some photos from Michelle, who thought of a very creative way to use the Carnival Party Pack! She used the blue and red theme, and turned it into a Dr. Suess party (featuring Thing 1, and Thing 2 for her twins!)I am in love with these cotton candy cupcakes. I created some custom cupcake wrappers for her. (they say Thing 1, and Thing 2 on them)
Check out her blog for more details, and tons of photos!

Tuesday, January 12, 2010

Calling all Mom's!!!

I am currently creating new "party packs" for my etsy store. Is there any theme you would like to see?

Thursday, January 7, 2010

A baseball themed party!

What little boy wouldn't want a baseball themed birthday party? This party pack makes throwing the perfect bash a snap! Ticket invitations, custom photo baseball cards, pennant banners, and hot dog trays! Wouldn't this go great with the popcorn cupcakes too?

Simply print and trim, and you have a fantastic party!

Tuesday, December 15, 2009

Eat, Drink, and Be Merry!

The perfect set for all your holiday parties! Complete with markers for your wine glasses. Just print, trim, and party!


The party pack includes matching favor boxes, a hanging wine bottle label template, and many more items, for a Merry themed party.

Wednesday, December 9, 2009

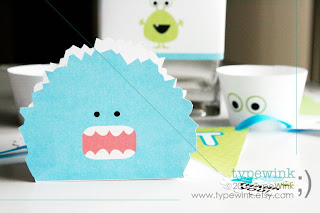
Cute Silly Monster Party Pack

How charming would these be for a little boy's birthday party? I especially love the little monster foot prints. My kids would love to follow the footprints to a party!Get them here.

Friday, November 20, 2009

Popcorn Cupcakes!!!

How amazing are these cupcakes?? I think they turned out so darn cute. They actually look like a hot mess WITHOUT the cupcake wrappers. Get the wrappers here.

Friday, November 13, 2009

I want that: ANIMAL PRINT

It's time to covet again. I am on a major zebra-print kick right now. I think my inner diva might be trying to get out, so here are a few items to help tide me over.This set would make the perfect bachelorette party set, or perfect for a little girl's birthday party. (or a Sex in the City party?) The centerpiece band could be used in so many ways, wrapping candles, vases, and flowers. Grab it here.
Something for our furry friends, catnip fortune cookies. Find them at JackandMicah's shop here.A little something to spice up your walls. Find it at erinsmodernart.
This may be quite possible the cutest thing I have ever seen:I can hear you saying, "awwww..." Get it at Swifferkins's shop.